|
OK, you’ve grown a fine crop of taro and
are ready to serve it up…
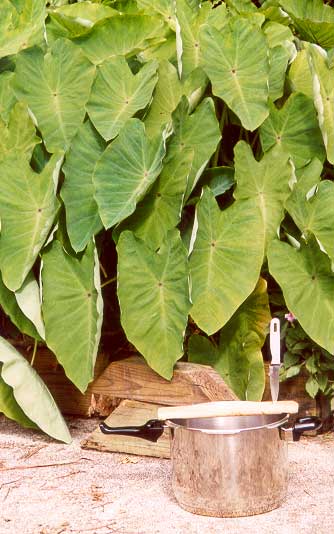
I use a pressure cooker, as that gets hotter than
just regular boiling. (I don’t think it is critical.) The only thing that is tricky with taro is the “itch”.
If you eat under-cooked taro, you will get an itchy throat.
For years in my early days in Hawaii I would try
to cook taro leaf the way everyone says (just boil it in water), and every time it caused itching.
I think the only trick I was missing is that all those old recipes
also called for salt, and salt definitely takes the itch away. But high heat does, too, so I use both salt and the pressure
cooker.
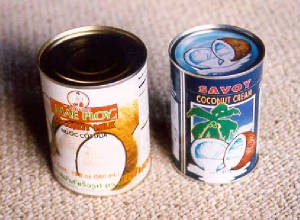
Another thing you will need (for my recipes, but taro is fine
without) is coconut milk, so you might want to get a few cans ahead of time. There are many brands and prices. The cheaper
ones are generally more watery (less total fat per can), but fine.
Back to harvesting taro. Generally you will be
using three parts of the plant, the leaves, the stems, and the roots. It’s “all good”, but there are some
minor considerations.
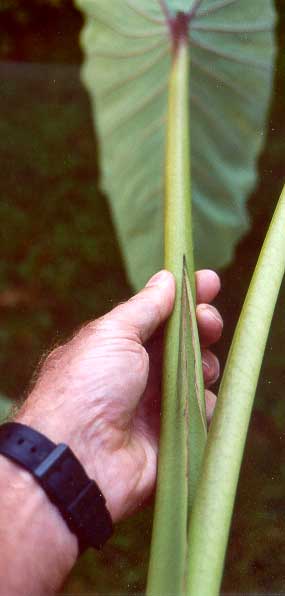
The leaves and stem go together. The lowest I usually
cut a stem is at the top of the “V” where the next leaf comes out.
(If you have to stretch your harvest, you can go lower. The
whole stem is fine. It just tastes a little “plain” compared to the other parts. More stem simply dilutes your
dish a little. And the top of the stem tastes a little better than the bottom. But you do want some stem. It adds a
little sour tang to the flavors. The best is the "piko", and often when a leaf is otherwise trash, I cut out just the piko
area.)
One of the advantages of growing taro in the “bunch”
method (we’ll get to that later) is that the harvest tends to be a few whole plants. That way you get a little corm
each time, which is a nice flavor addition.
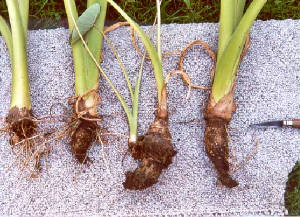
Now let’s look at selecting the good parts
of the corm. The only “bad” corm is kinda rotten and you can usually see and smell it. You usually only get it
like that if growing “wetland”, and if the corm was deep in some mud with no oxygen.
In the corms pictured, some have a bit of an hour-glass shape
– thin parts separate fatter parts. (The knife points to a thin part.) Each fat part is a time of growing (most are
fat on the top, as these just had all summer to grow outside). The thin parts are probably the end of winter, indoors, or
something. (But even outdoors in Hawaii, taro cycles. It will gradually go dormant, then re-grow again. Here the 2nd
one over is going towards thin and dormant.)

Basic “Fake Palusami”
(PAH – LOO – SAH – ME)
(Real palusami is baked. You can buy it at Samoan
markets, like that little one at the corner of Vineyard and Liliha.)
About a pound of taro leaves
One can of coconut milk (rinsed, essentially adding
a cup of water)
One teaspoon salt
Cook in pressure cooker on fairly high for about
30 minutes.
……………………….
That’s it! This will feed a half dozen people.
Everything else is just bonus land.
Typically in Hawaii I double this, to feed all
the hungry surfers and have a little leftover.
And, typically I add things. Meat is great. The
two favorites are cooked hamburger meat (basically taco meat*, already cooked and seasoned, usually frozen, about a cup) or
Kielbasa (Polish sausage from the store, which is precooked). In the top ten
are Spam, canned tamales, rotisserie chicken…
Corms and stems, of course.
If I don’t have corms, sometimes I add a
potato or two, quartered. They are good, but dilute things a bit.
In Iowa in the fall I add a fat phat tomato or two, chopped up. Delish. Ditto green
onions, esp. the "Tokyo neggi" type (planted deep, so there is a foot or so of the blanched white part below the dirt).
Cooking time. I typically cook before surf, and
let it sit for hours before serving. And I gently swirl the stuff inside the pot a few times. Usually start on full high to
get things steaming (about 10 min), then swirl and cut down to medium another 20 min or so, then swirl and cut down to ultra
low and leave it. (When swirling, you would not want to plug up the pressure release hole.)
Buying taro leaf in stores in Hawaii.
You can get taro leaves, usually in one pound bags, in most produce departments now.
They are all good, but you can be picky if you like. The best ones have the biggest stems near the leaf. Big stems mean they
are harvesting at the growth peak, not later in the long semi-dormant period when all you get is small leaves. “Near
the stem” means you aren’t getting faked out by a super long stem that just means more stem, not a big leaf.
For the recipes above, the ratio I use is one bag of leaves to one can of coconut to
one tsp of salt. I just chop up the whole bag of leaves – no wash, no cutting the stem ends off, etc.
My buying situation: For the last few years 90% of the taro leaf I’ve been serving
in Hawaii has been store bought. Many weeks that is 3X a week, 2 bags each. Just recently I am getting more self-sufficient.
One of the reasons I first started growing taro was that was the only way to get the
leaves. You could buy poi and corms, but generally not leaves, at least not in regular retail stores.
The first product I noticed was at Times, from Wong’s, I think. Their farm is
on Waihe’e road, behind Tomoe and Sean’s new house. More recently a new contender is selling at Safeway. The brand
is Kahalu’u I think. Their first product had huge leaves and short stems – the best I had ever bought.)
*Taco meat
I assume you know taco meat is just cheap hamburger
fried up with onions, salt, pepper, and tons of chili powder. Here are 2 tricks if you are making large batches.
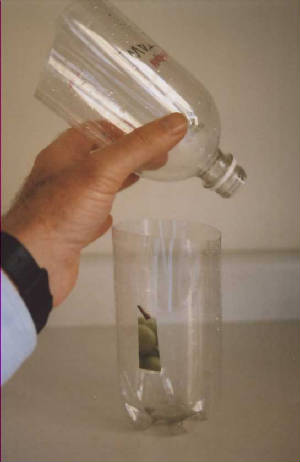
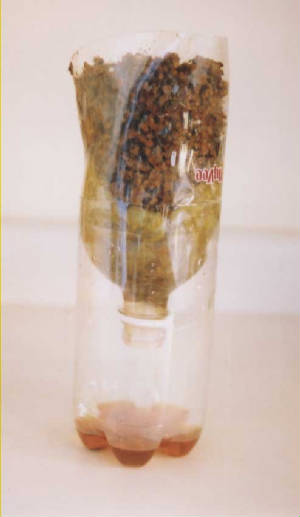
Grease strainer: The problem with a huge frying
pan full of cheap hamburger is all the grease. You can make a free disposable strainer out of 2 pop bottles. Cut the top one
like a funnel (cut the bottom of bottle off), and put a napkin in. Cut the bottom one like a cup, to receive the grease drippings
from the funnel. Afterwards put the drippings in the fridge to solidify, then toss into trash.
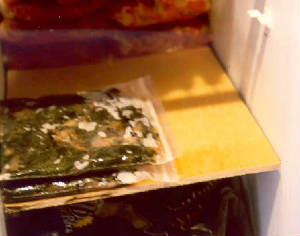
Freezer storage: After the meat has cooled, put about a cup
or so in Ziplock bags and freeze. Handy for next time you do taro or want some tacos.
If you have an imu all fired up for your luau,
you can make some bundles with taro leaf and a little salt. More on luaus later, but quickly a bundle is made with ti leaves
(with the stiff mid-rib removed) and a piece of aluminum foil. Add a generous amount of salt as it will be steaming for a
few hours. Here we are using the same mix used for the meat bundles, ½ red “alae” salt, ½ rock sea salt. If you
have coconut cream, add a dab and you have, I think, real palusami. Either way taro leaf from the imu is extra delicious.
Quick side trip to life cycle of taro from the Univ. of Queensland.
On to taro varieties
|