|
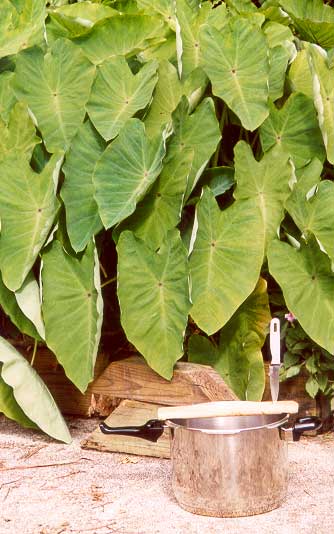
The first good result was lots of leaves –
the main thing I wanted.
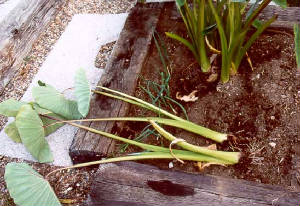
When I harvest these small plants to cook, I usually just chop them up near a garden
where I can just toss the scraps, chopped up small. (Scraps are in with hostas, top right of picture to the right. Minor detail,
but it makes life easy.)
3.
Then transplant to dryland. It is OK if the plants have gotten all rootbound, etc. Ideally to some good dirt somewhere in
the sun, but anywhere is fine. Can be planted in biopiles, etc. Easy planting – just cut the jug away and plop into
hole. These plants are ready to explode. Weeds are a minor concern as these plants will dominate any new ones. (If old weeds
are there, spray with RoundUp, a few weeks ahead ideally.) The second round of harvesting on these guys is both great and
easy. Lots of leaves for awhile (starting in about 4 months ideally), then just pull the whole plants out and use both leaves
and corms. The corms pull out and apart so easily it is amazing. Plant a few of these and start the cycle over.
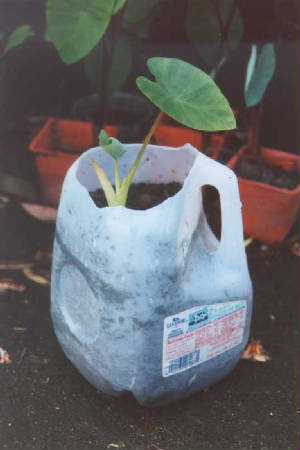
(Not a great pix. This plant is only 4 months old,
but you can see it is already filling an even larger space up with roots. And you can see how easy it is to cut the jug open
to do the transplanting. All you do is drop the whole mass of roots into the new dirt hole. Very neat.)
(Next I will try this with piialii, my tasty corm
variety. I usually do that one wetland, for which I have a limited amount of big spaces, for a year or so, and in the moan
and groan 5 gal buckets. If it works, it will give an easy turnover – just go pick a few. I doubt I will get the full
sized corms, but it should give more corms per batch, probably a cluster of medium sized corms. And I have lots of dryland
patches I can use to grow these out.)
|
 |
|
|
|
|
|
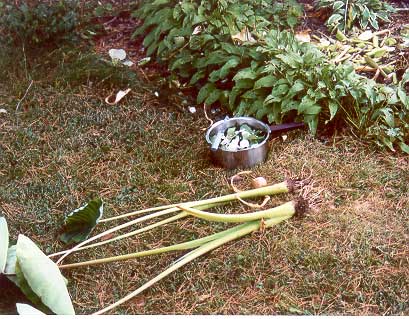
Here is the result of the “bunch” method – a nice cluster of medium
sized plants, super easy to harvest one plant at a time. You can pull these apart like plucking grapes. It wasn’t always
like this.
The problem I used to have was what to do with the old corms once I had harvested leaf
off of them many times. (If you start now, you won’t be at this problem for a year or so.)
(Sorry, no pix.) The end result of the “bucket lo’i” method is a
crowded pot if you don’t turn it over and replant fairly often. The corms end up sort of plump and round, dormant, with
no leaves at all hardly, and covering the entire surface of the pot. The plant is so root bound it couldn’t dream of
growing. The tightness makes it impossible to harvest a few corms individually without wounding the rest (which could get
some weird disease going). If the pot is a 5 gal bucket, the tightness makes it hard to even get all out at one time. And,
what you get, the corms, aren’t really valuable. You rarely need that many to plant, and as food they taste marginal
because of all the previous leaf picking. (It is not as bad as all this, but it was usually the low point in the cycle.)
But, once, rather than
throw these away, I planted a few of these clumps out in a garden area (“dryland”), all together, no attempt to
break up the clump.
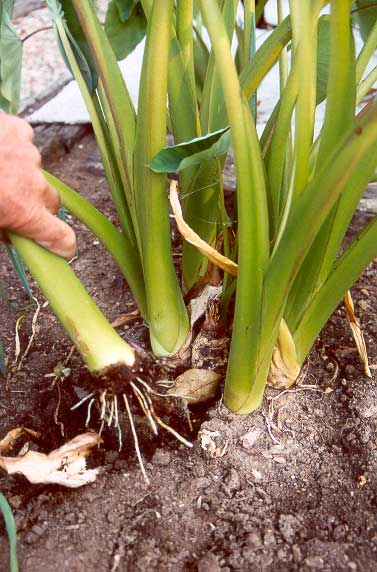
Then, after that had sort of peaked, but not completely, I tried
to break off a whole plant, corm and all. Amazingly easy. And it yields a small amount of corm – just what I wanted
– and a little at a time. With some more leaves. And nothing to throw away. The individual plants are perfect for planting
also.
The result of this experiment is a good cycle for
me that takes advantage of both wet and dry advantages. I’ll summarize it (for my benefit as much as yours). None of
these stages is either time critical or laborious.
- Start
keiki (the young plants) in milk jugs. (The easiest keiki are from pulling dryland at harvest at the end of this cycle.) Use
good fertile dirt that will need zero fertilizing. Grow in the milk jugs dry for 3-12 mos, whatever is convenient. The main
goal of this stage is to get at least about 12" high so they can be dropped in
the water. Don’t sweat weeds.
- Next
grow the jugs wet for 3-12 mos. Whatever timing is convenient. Dropping in the water kills any weeds. May want to add a little
good fertile dirt if it has been a long time. During this stage there can be
a fair amount of leaf harvest once the plants are fairly mature.
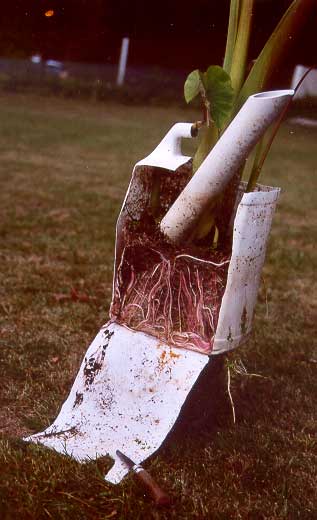
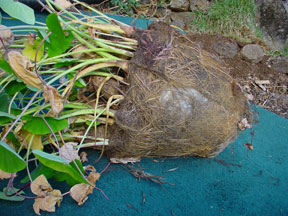
At the other extreme, here is a very root-bound taro plant.
It is past its prime for a “bunch” planting (it took a pretty big hole in the garden, and the pot was hard
to extract). It has been in the water for a couple of years. You can barely even see the pot (white, under the roots). Note
the tiny leaves, and plethora of dormant corms.
On to easiest Iowa cycle
|
|
|
|
|